Tag Archives: Powerlifting

THE HIP IMPINGEMENT SOLUTION

INTRODUCTION

As we strive to be more active, healthy and mobile, the hips are put under a large amount of stress.  With the increase in functional training, more emphasis is being placed on squatting, lunging, deadlifting and Olympic lifting. Functional exercises are essential in any training program, but for these exercises to be performed correctly, the hips must be able to transfer force from the ground and through the spine. When there is a minor deviation in hip movement, increased friction can occur inside of the joint leading to soreness. Many times after a training session we are experiencing appropriate muscle soreness, which is excellent and needed for increased strength gains. Post exercises soreness should be isolated to muscular tissue in the posterior or lateral hip. If you are experiencing anterior/lateral hip or groin pain the following article should benefit you greatly. Femoral Acetabular Impingement or FAI is becoming a more common pathology identified in the active population due to advancements in diagnostic imaging and clinical assessment. My goal for this article is to educate the reader on the anatomy of the hip, what is FAI, what causes FAI, symptoms of FAI, how to self assess if you are at risk for FAI, and lastly how to address any issues you may be experiencing through a series of corrective exercises.

HIP ANATOMY

Before we go any further, it is important to review the anatomy of the hip to ensure we are all speaking the same language as we move into the causes of FAI. The hip joint is a ball and socket joint consisting of the head of the femur (ball) and the acetabulum (socket). Below are two images of hip boney anatomy. In the figure to the left, we can clearly view the head of the femur and the acetabulum, which are surrounded by various ligaments and joint capsule to encompass the “hip joint”.

Screenshot 2015-03-23 12.34.40

The hip joint is a very complicated joint from a ligament and muscle standpoint secondary to multiple connections from the trunk, shoulder, hip and thigh musculature. For the sake of the topic of this article, we will not dive into all of the ligaments and muscles of the joint, but I would like to point of some key structures which play an important role in this pathology.

Screenshot 2015-03-23 12.34.49

Iliopsoas AKA “hip flexor”:  this muscle attaches from the lumbar spine to the femur (thigh bone) and acts to flex the hip. When this muscle is overly tight, it can cause excessive anterior tilt in the pelvis and lead to abnormal alignment of the hip joint. Picture of muscle seen in with arrow in image to the left.

Gluteals: there are 3 gluteal muscles that attach from the back of the ilium (hip bone) to the femur, which combine to extend/abduct the hip. When these muscles are weak, it can lead to poor knee control during squatting and lunging. Poor knee control can lead to poor mechanics, which encourage hip impingement.

Deep hip external rotators: this muscle group consists of many small muscles that attach from the sacrum (tailbone) to the femur, and act to externally rotate the femur. When these muscles are weak, the knees have a tendency to cave-in (valgus) during a squatting motion.

Screenshot 2015-03-23 12.35.13
CAUSES

The causes of FAI are currently not completely understood, though it is hypothesized that faulty mechanics during daily activities and squatting can cause excessive compression between the neck/head of the femur and the rim of the acetabulum leading to impingement. When excessive contact between these two structures occur, bone growth can form, which leads to a CAM or Pincer type deformity shown below. A CAM lesion is an abnormal formation of bone growth on the neck/head of the femur, which leads to increased contact between the femur and acetabulum causing a pinch when the hip goes into flexion/adduction/internal rotation. A Pincer lesion is an abnormal formation of bone growth on the outer rim of the acetabulum, which also leads to increased contact between these two structures. While CAM lesions are more common in males, and Pincer lesions more common in females some studies suggest 86% of symptomatic people experience a combination of both deformities.

In an attempt to understand what faulty mechanics might possibly cause CAM and Pincer deformities, many studies have identified excessive hip flexion/adduction/internal rotation as the culprit.  The image on the left demonstrates a view of how a lesion may appear while the image on the right dictates the classification for each lesion.

Screenshot 2015-03-23 12.36.55

SYMPTOMS

Symptoms of FAI can vary and for the sake of this article, we will address anterior hip FAI opposed to posterior hip FAI when discussing possible symptoms.  Many individuals who have been diagnosed with FAI have the below complaints:

  • Pain in the upper groin area or from front to lateral hip
  • Deep ache that commonly cannot be palpated
  • Insidious onset
  • Pain with activity (deep squatting or lunging)
  • Difficulty sitting
  • When severe, pain with putting on shoes/socks

It is important to note that though you may be experiencing one or two of these symptoms, you still may not have pathology. Many time symptoms of FAI can be confused and misdiagnosed as a hip flexor or groin strains.  If one side feels different than the other, caution must be taken when training into positions of deep squatting, lunging, twisting and higher impact plyometrics without consulting a physical therapist or orthopedic specialist.

SELF-ASSESSMENT

In this section we will go over some self assessment techniques to help you determine if your are experiencing symptoms that may be associated with FAI, though these movements are in no way a substitute for a professional clinical examination from an orthopedic specialist, physical therapist, or surgeon. There is a limit to ones ability to perform self-assessment, and an orthopedic specialist will use a variety of special tests and diagnostic testing to ensure an accurate diagnosis.

Screenshot 2015-03-23 12.37.06

Squat test: stand with your feet hip width apart (narrow stance), toes pointing forward and arms overhead. Keep your elbows locked overhead, toes pointing straight forward and your back as neutral as possible, squat down as deep as you comfortably can go. This test is positive if you feel a pinch in the anterior/medial groin. *This is more of a clinical assessment, not a test that has been validated in the research.

Hip flexion test: Lye on your back with both legs straight. Pull one knee to your chest without letting your knee rotate to the outside. Note how high you can flex one hip compared to the other. Test is positive if you feel a pinch in the anterior/medial groin or there is a significant difference in range of motion between the two sides.

*This is a self-assessment of your hip flexion range of motion. Many times hip flexion range of motion is poor with individuals who are experiencing hip FAI. This is more of a clinical assessment, not a test that has been validated in the research.

Screenshot 2015-03-23 12.37.12

FABERS test: Lye on your back with both legs straight. Bring one foot to the opposite knee and let your knee drop to the ground. Note the difference from side to side. Test is positive if there is a significant difference in flexibility from side to side or there is a pinch pain in the medial groin region.

Screenshot 2015-03-23 12.37.16
Thomas Test: Lye off the edge of a table, rock back holding both knees into your chest. Keep your back flat against the table at all times, grab one knee while you let the other knee fall to the ground. Repeat for the opposite leg. Test is positive for iliopsoas (hip flexor) tightness if your thigh does not go flat onto the table, positive for quad tightness if your knee cannot bend >80deg at the bottom of the movement.

*If these tests are positive, it does not mean that you have pathology. These tests will simply identify movements, which cause impingement in the hip. To get an accurate diagnosis of your pain, an orthopedic specialist or surgeon should be consulted.

ACTIVITY MODIFICATION

While no one likes to change what they are doing in their normally daily routine, research has been shown to significantly decrease FAI hip pain with simply changing daily habits that may be contributing to continued irritation. Below is a list of activity modifications that should be performed if you are experiencing above stated signs and symptoms:

  • Sitting: sit with hips in external rotation as opposed to knees together
  • Eliminate sitting with legs crossed
  • Side sleepers: sleep with pillow between your ankles and knees. Avoid excessive hip flexion while sleeping.
  • Sumo squat opposed to squatting with a narrow stance
  • Avoid biking as this causes excessive hip flexion

These activities should be modified until symptoms are completely reduced. Once symptoms are eliminated, caution should be taken when returning to normal activities.

STRETCHING

Stretching and regaining normal range of motion and flexibility is extremely important when addressing deficits related to FAI. I would caution from “over stretching” the hip as this can cause irritation within the joint. Extreme caution must be considered when performing below stretches. Stretching for hip FAI includes the use of an elastic band, as the elastic band will help create slight traction in the joint; therefore, decreasing the risk of impingement and increasing the stretch of the tissue being addressed. Stretching performed prior to a training session should be dynamic and be held no longer than 5 seconds, while stretching post training should be held for duration of 20-60 seconds based on age (longer holds for increased age). All stretches should be performed for 2-3 sets for optimal flexibility gains.

  • Kneeling hip flexor
  • Prone quad
  • Quadruped adductor
  • Quadruped glute
  • Supine hip flexion

Glute

Hip flexion

Adductor (left) and hip flexion

Quad

While not all of these stretches will need to be performed daily, areas of tightness are going to need to be addressed to make significant gains. If the Thomas test above was positive, more attention is needed to the quads and hip flexor.

If the hip flexion assessment listed above was significantly different than the non-involved side, pay more attention to the hip flexion stretch. The glute and adductor stretch are great for preparing the hip for the sumo squat position listed below. If any soreness or pain is felt with stretching, be sure to immediately stop that given stretch. Do not try to push through any discomfort with these stretches, and contact your local physical therapist or orthopedic specialist if you are experiencing negative results with the above listed stretches.

CORRECTIVE EXERCISES

Corrective exercises are just that, corrective. These exercises are not huge strengthening exercises, especially in the beginning phases as proper muscle activation needs to be achieved before advancing to more functional positions. These exercises are broken up into 3 phases and are intended to ensure proper muscle activation in phase 1, increased difficulty in phase 2, and muscle hardening in phase 3. All of the exercises listed below or intended to decrease the tendency for the hip to obtain the position of flexion/adduction/internal rotation, which we now understand from research are the compromising positions of hip FAI. Each phase has a purpose and should not be skipped or overlooked. An individual can move on to the next phase when the appropriate sets and reps are met with minimal fatigue, perfect form, appropriate muscle activation, and no pain with any exercise. *For exercises not pictured below, a quick google search will do the trick. Pictured below are the less commonly understood exercises.

PHASE 1 (3x20reps)

  • Sidelying clam
  • Sidelying hip abduction
  • Donkey kick
  • Bridge

Hip abduction


Screenshot 2015-03-23 12.38.10


Screenshot 2015-03-23 12.38.20


PHASE 2 (3x15reps)


  • Standing band clams
  • Band walks
  • Single leg RDL
  • Sumo squat w/band around knees
  • Bridge on ball
  • Glute/ham raises


Band walk

Glute/ham raise

Standing clams

SL RDL

Bridge on ball

 PHASE 3 (3×8-10reps)


  • Single leg squat (increasing depth)
  • Split squat w/band
  • Single leg RDL w/band (same band position as split squat)
  • Sumo squat w/weight
  • Single leg bridge on ball
  • Glute/ham raises (add weight)


Screenshot 2015-03-23 13.18.57
Incorporating these exercises into your daily routine is going to be a huge part of being successful in addressing hip FAI. If performed correctly, these phases can be progressed through in 1-2 week blocks. Once you have completed the final phase, incorporate as many phase 3 lifts as you can into your normal training routine. Review your training with your strength coach to come up with the best possible program. I would also encourage performing phase 1 exercises (1 set) prior to heavy squatting days to ensure your hips are properly activated prior to loading. Stretching can be continued throughout life as staying mobile in your hips will allow for full movement and continued strength gains throughout your training.

I hope the above information has helped open your eyes to an increasing common pathology that has been surfacing in the Olympic lifting and Cross Fit community. As previously discussed, if you are experiencing pain with the above listed stretches or exercises, please stop them immediately. If you continue to experience hip pain you should schedule an appointment with your local physical therapist or orthopedic specialist to undergo a thorough evaluation of your condition.  Hip pain can arise from many different pathologies, and hip FAI should be considered if there is continued anterior hip pinching felt with daily activities or after training Please feel free to contact me with any further questions or concerns you may have.

If you have found the above information helpful, you can also view my Ebook “Body Mechanic” through the Juggernaut online store. Link with description of content is listed below.
Team JTS Answers: How to Bounce Back From a Miss

No one goes 6 for 6 or 9 for 9 in every meet.  A missed lift, especially on a first or second attempt, is a potential turning point for you in the meet.  Do you have the mental strength to bounce back, crush the lift, and still put together a good total?  Or is that the moment when all the hard work you put in comes crumbling down?
Third attempt misses (especially when aiming for PRs) can be even more daunting or empowering.  They set the tone for your next training cycle.  Do they make you doubt yourself, or light a fire that inspires you to push yourself harder in your next training cycle to make up for it?
Here’s how some of Juggernaut’s top competitors dealt with key missed lifts:

Colin Burns

Coming back after a close miss can be one of the hardest things in weightlifting, but only if you let it. On my second attempt at the Arnold, I pulled a new American record, put it overhead, and stood up. A little wiggle in my shoulder caused it to shift backwards, I saw a white light, and I dropped it. One white light, two red lights. No lift. Even with the down signal, it is still left up to the lifter to make sure the weight is under control and motionless before put down. One judge felt I stopped for a moment, the other two didn’t. That’s on me. You can’t leave it up to the judges.

The meet wasn’t a success, but getting back in the game isn’t just about training again. You look back, and you learn. A close miss can be powerful fuel. It was right there! The lift was as good as done, so you know what that means? It’s there. The capability is there. Use this knowledge to your advantage. Chalk it up as a win and know you are good for more. This can fuel your training into your next meet where you put it on the platform and make everyone forget about the time you missed because you have overshadowed that with an undisputed make. It’s a game in your own mind over which you have total control.

https://www.facebook.com/JTSstrength/videos/vb.116781865025503/815855575118125/?type=1&theater

Ariel Stephens

Make a lift. Miss a lift. Either should not change the way you approach your next lift. Obviously, making a lift gives you a boost in confidence and motivates you to make your next attempt. What happens when you miss a lift? Do you get mad and parade around the gym or competition hall like a banshee? Do you feel sorry for yourself and beat yourself down mentally? If either of these sounds like you, then consider a new perspective.

At the 2015 Arnold Weightlifting Championships, I was in the running to make the 2015 Pan Am Game Team. I opened with a near max attempt clean and jerk (115kg). I needed a 122kg clean and jerk to seal my spot on the team at that point in the competition. My coaches and I decided to go for it. Before this moment, my best clean was 123kg and my best jerk was 118kg. However, these were not the thoughts that were going through my mind. All I could think about was that I was capable of making this lift and that I owed it to my hard work in and out of the gym to make this lift. So, jumping 7 kg for my second attempt didn’t go well. I didn’t even rack the clean. Instantly, I knew that I lost my low back off the floor and pulled too slow. I didn’t freak out or tell myself that it was impossible. I kept calm, knowing that most people were thinking that I had made too big of a jump. I composed myself, took a deep breath, and told my coaches that I knew I could make the lift.

As I walked out for my third attempt and heard the whole crowd cheering for me, I smiled. I smiled because I was proud of how far I’ve come. I smiled because of the support I had. I smiled because I was confident. I smiled because I knew I had missed lifts a million times before, only to come back and make them. I smiled because I knew I was going to make this lift. On my third attempt, I easily cleaned the weight, locked the jerk out overhead and barely lost it in front, resulting in 3 red lights. Of course I was disappointed that I didn’t make this lift, but in this moment, I understood that this was only the beginning of much more.

Next time you miss a lift and are upset, belittled, or frustrated, know that none of those feelings are going to help you move onto your next attempt. Every attempt is separate from the last. Whether it’s a routine training session or the biggest competition of the year, believe in the work you’ve been doing and have confidence in every step you take toward the bar.”

https://www.facebook.com/JTSstrength/videos/vb.116781865025503/812469008790115/?type=1&theater

Chad Wesley Smith

Of course I didn’t want to miss or plan to miss, but it happens and it doesn’t shake me. If you have a missed lift, you need to step back and analyze why. Was it a technical problem? Did you not eat well that day? Did you not sleep well the night before? Were you not smart in your weight selection, aka you aren’t that strong yet? It is one thing to look at these things and treat them as excuses – don’t do that. You need to be honest with yourself and figure out why you missed and then create a plan to fix that problem.

During my last two meet training cycles, I missed my two heaviest training squats, missing 815/835 in training before making 937 in the meet and missing 875/930 in training before making 959 in the meet. Also, in both of those meets, I missed my second attempt squats before coming back and making them on my third attempts for PRs. When you miss a lift, you can panic, scrap your plan, and go into a tailspin, or you can compose yourself, correct your flaws, and come back and smash it the next time.”

Dmitry Klokov

The 1 Rep Max is Dead

Here’s what you need to know…

  1. You don’t have to work up to a one rep max to get the full benefit of the maximum effort method.
  2. Gains made within the 90 to 100% range will lead to an increase in your 1RM, even if you aren’t working up to a true max every workout.
  3. Training is not testing. Displaying strength is not always the same as building it.
  4. Using a 2-3RM allows for better recovery, safer training, more frequent sessions, and better muscle gains than 1RMs.
  5. Powerlifters, especially geared ones, of course have to practice more with 1RMs, but even they would build more strength using 2-3RMs in training.

The Truth About The 1RM

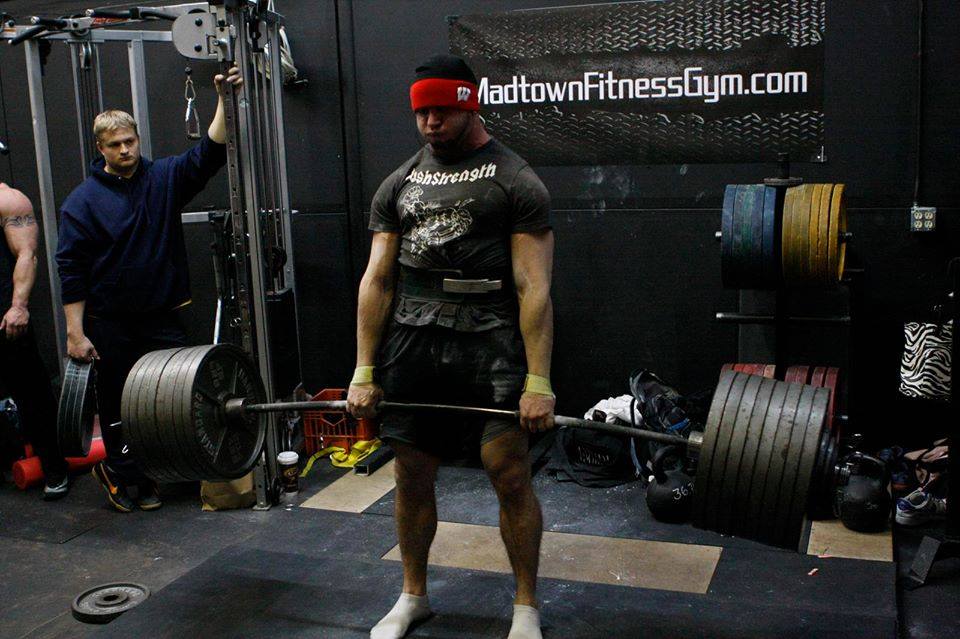
CT Deadlift

My favorite number of reps to do per set is one.

I’m a strong advocate of the maximum effort method, and ramping up to a 1RM has always been a significant part of programs. So this may surprise you:

Ramping to a 1RM is not the best way to do maximum effort work.

It works really well for 4 to 6 weeks, but after that you tend to show signs of stagnation and even regression. For that reason I’ve changed the way I do maximum effort for myself and my athletes.

For most of us, there’s no need to do 1RMs. A 2RM or 3RM actually works better for building strength. Here’s why.

Defining Maximum Effort Work

Max Effort

Most people associate the maximum effort method with two things:

  1. Working up to the maximum amount you can lift for one repetition (1RM) on a basic movement
  2. Westside Barbell

Well, most people are wrong!

It’s true that the Westside Barbell system uses a variant of the maximum effort method every week, along with the dynamic effort method and the repetition method. But most people really only think about the max effort method when they think of Westside.

But the maximum effort method had been around for much longer than that. Before Westside, powerlifters would „max out“ only at the end of their training cycle.

People also believe, wrongfully, that the max effort method is all about working up to a maximum lift for one rep. Not true.

Zatsiorsky explains that the maximum effort method consists of lifting loads that are in the 90-100% range. You don’t have to work up to a maximum for a single rep to do max effort.

In Russian weightlifting literature, an important measure is the number of lifts at or above 90% of maximum, not the number of maximal lifts.

How Maximum Effort Works

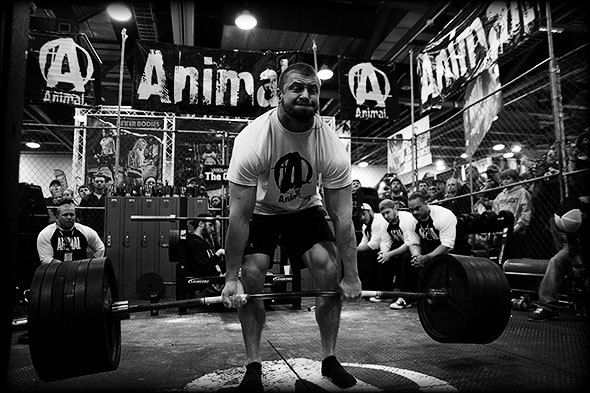
Deadlift

The nervous system decides how the muscles will produce force to overcome a resistance. It can increase force production via four mechanisms:

1. Recruitment of muscle fibers: The more muscle fibers are recruited when doing an action the more force you can produce. And the more fast-twitch those recruited fibers are, the higher the force output.

So the first way to produce a stronger muscle contraction is to become efficient at recruiting more muscle fibers, and becoming especially efficient at turning on the most powerful fast-twitch fibers.

2. Rate coding/firing rate: Your body has a limited capacity to recruit muscle fibers. The way to increase force production once it becomes hard to recruit more muscle fibers is to increase the firing rate of the recruited fibers.

Every time a muscle fiber „fires“ it produces force. So the faster it can fire, or the more twitches it can do per unit of time, the more force the muscle will produce.

Past the beginner stage, improving rate coding/firing rate is the main way the body adapts to producing more force.

3. Intramuscular coordination/muscle fiber synchronization: This means having the recruited muscle fibers fire in the most advantageous pattern to execute the movement.

It doesn’t always mean firing everything at once. Sometimes the best recruitment pattern is asynchronous. In fact, in the slow-speed strength movements (deadlift, squat, bench press, military press) it almost always is.

4. Intermuscular coordination: This refers to how the body uses the various muscles involved in the movement. For example, the antagonists must relax at the right time to allow the agonists/prime movers to do their job, but not so early that you lose stabilization.

If the antagonists don’t relax enough you’ll be fighting your own body, on top of fighting the weight. If they relax too much you might lack stability, get injured, or not have a strong foundation from which to push off.

The last two elements are done through frequent practice of the movement. The more often you practice a lift under a significant load, the better your intra and intermuscular coordination will be.

Related:  Russian Strength-Skill

Rate coding/firing rate and muscle fiber recruitment are the elements improved the most via the max effort method. And in intermediate and advanced athletes, gains come almost exclusively through rate coding.

The Power of Rate Coding

Heavy Barbell

Rate coding is the same for weights in the 90-100% range. It isn’t superior with weights of 97-100%.

As long as you’re training in the 90-100% range you’ll get the proper neurological adaptations. So it becomes a matter of what load and set/rep scheme will allow you to do the most work without any drawbacks while staying in that 90-100% zone.

To develop strength, weights of 90 to 100% have a similar effect. In fact, weights of 90-95% of your maximum done for sets of 2 or 3 reps are likely superior to doing all-out max sets of 1 rep.

Maxing out on a 1RM is useful for powerlifters because they need to learn to perform at an optimal level for a single shot. You’ll likely notice that during a set of 2-3 reps, the second rep is often better than the first one. So being able to perform on the first rep is a skill that powerlifters must develop.

But for most of us, working up to a 2 or 3RM when doing a max effort will be more effective. In fact, even for powerlifters, working up to a 2RM during their max effort day would build more strength than working up to a 1RM. Maxing out on a 1RM should only be done about 20% of the time.

Heresy you say? Hear me out!

The Mindset for Success

A 2-3RM is also better than a 1RM for max effort because it puts you in a better mindset for success.

Attempting a set of 2 or 3 reps implies that you’ll succeed on the first rep. So right off the bat you know that the set will have some degree of success. It’s just a matter of how much success.

This will make you more confident when approaching the lift. As any seasoned lifter knows, confidence in the face of a max effort can make a huge difference in the success of a set.

Why is the second rep often more solid than the first one? This is due to both a potentiation/activation effect and also because the first rep gets you in a better groove.

If you’re shooting for a 1RM there will come a point where you have some doubt about being able to lift the weight. This can wreck havoc on your confidence and ultimately on your performance.

The Safety Factor

Bench Fail

On your way up to a 2 or 3RM set you’ll almost always (unless you plan your loads badly) be able to get that first rep in. Sometimes it might be harder than you expected but you should always be able to get it.

Now, when approaching your limit you might reach a point where you know after one rep that you won’t be able to complete the second one. You can simply rack the weight. You still had a productive set even though you only did a single.

When working up to a max it’s harder to evaluate if you can make the rep or not. When you unrack the weight you might feel like you can do it but midway through you realize you can’t. That can lead to bad form or a missed lift which could lead to injuries.

It’s easier to judge if you can get a second rep once you do rep one. How the rep felt tells you a lot about how much you have in the tank and if you can get that second one. With a set of one rep, when you approach limit levels you don’t have that „tool“ to tell you if it’s safe to attempt the lift or not.

Some people have the experience or discipline of knowing as soon as they unrack the bar if they can make it or not. These people are less likely to fail on a max set. They’ll know when it’s safer to re-rack the weight instead of trying it.

But the myriad of „lifting fails“ videos we see tells us that not everybody has mastered that skill yet!

More Practice with Near-Maximal Weights

Press Flag

Weights in the 90-100% range use similar recruitment and force production strategies. Gains made within that range will lead to an increase in your 1RM even if you aren’t working up to a true max at every session.

Training is not testing. You’re training to develop certain qualities/capacities that will make your body more effective when you finally test it.

The more practice you have with 90-100% weights, the more efficient you become at lifting maximal weights. In that regard, the body can tolerate more reps in the 90-95% range than in the 95-100% range.

Working up to a 2 or 3RM allows you to do a lot more work in the 90-100% range than if you work up to a max lift. This higher workload will lead to more stable neural adaptations than if you work up to a 1RM.

Strength isn’t just a physical capacity; it’s a skill. The more often you practice the skill of producing a maximum amount of force, the better you become at it.

If doing sets of 2-3 reps for your max effort day allows you to get 1.5 to 2 times more practice in the money zone, you’ll improve neural factors faster.

You could argue that you can simply do more sets of 1 rep. True. I reasoned that way myself for a long time. But for it to work you need to use weights in excess of 95% (otherwise just do sets of 2). And when talking about weights of 97-100%, the impact on the body is more profound than doing lifts of 90-95%.

Doing 6-10 lifts in the 90-95% range on a max effort day is fine. But doing that number of lifts with 97-100% will be too harsh on the nervous system for sustain progress.

The Psychological Component

Vasily Alexeev

Soviet lifter Vassily Alexeyev said to avoid „training on the nerve“ as much as possible. By that he means avoiding psychological stress during a session.

It doesn’t mean going easy; it means working hard but without going into a zone where you exhibit signs of marked psychological stress: a sudden spike in blood pressure, tunnel vision, heart rate almost getting out of control, needing to psych yourself up, etc.

Training on the nerve should be a form of „strength reserve“ – an extra gear that you can turn on as needed. It’s like the NOS in your performance car: it can give you a significant boost but it comes at a cost.

In training you should rarely have to psych yourself up to do a lift. Take a page from Olympic lifters. Watch videos of Russian weightlifters: they almost look asleep when they approach a bar in training, even when they equal or best the current world record (in training).

Tmax vs. Cmax

Zatsiorsky categorizes maxes as either Training Max or Competitive Max (Tmax or Cmax).

The former is the maximum amount of weight that can be lifted without any substantial stress and without heightened arousal – the need to psych up for the lift.

The Cmax (which doesn’t have to be done in a competition setting) is a max done under a significant level of arousal/psyching up and stress leading to an increase in adrenalin level.

The Cmax can be as much as 12% higher than the Tmax in advanced athletes used to performing under stressful conditions, but it’s normally around 5% higher than the Tmax in most people.

So, you can squeeze out more pounds by psyching up and getting stressed about a lift. But it comes at a price since the increase in adrenalin production can exponentially increase the negative impact of the workout.

You should thus avoid getting hyped up before a lift as much as possible, keeping that reserve for special occasions.

A 2RM doesn’t place the same psychological burden as a true 1RM. So you won’t get the same stress response but you’ll get a training effect that’s just as good, if not better.

Stimulate More Fast Twitch Fibers

Woman Bench Press

A muscle fiber that has been recruited but not fatigued hasn’t been trained. If you recruit fibers but don’t fatigue them, you still get a training effect by improving your capacity to recruit fibers, but you won’t make them grow.

When doing max effort work you’re using the anaerobic alactic energy pathway which has a limit capacity of 20 seconds. In other words, if you work at a high enough intensity to tax this system, you’ll run out of fuel in 20 seconds at the most.

Anaerobic alactic capacity begins to be taxed after 7-10 seconds of intense work. If the effort lasts less than that you aren’t creating much fatigue and thus you aren’t stimulating the fast twitch fibers to grow.

If you do sets of a single rep of max effort work, it will last at the most 4 seconds, maybe 5. But most of the time we’re talking about roughly 3 seconds. Rarely will it go into the 7-10 second range unless you go slow on purpose, which tends to diminish your capacity to lift maximal weights.

If you do sets of 2 reps the muscles will be under load for 7-10 seconds, and if you do 3 reps they’ll be under load for 11-14 seconds.

In both cases the actual fatigue/stimulation of the fast-twitch fibers will be greater, especially if you do multiple sets. The result is that you’ll stimulate actual tissue growth, not just improved muscle fiber recruitment.

Questions to Ask Yourself

Barbell and Dumbbells

I want to point something out: a lot of powerlifters who switch to the typical max effort method of doing a single rep already have a high level of muscle mass built through years of training.

For them, max effort isn’t about building more muscle. And they’re doing a high amount of auxiliary work to build muscle anyway.

But I believe in trying to make every method optimal, or as effective as it can be, as long as it doesn’t detract from its intended purpose.

To do that I ask myself: „If all I could do was this method, would I get both stronger and bigger?“ If the answer is no, then I look for a way to make it more effective without coming into conflict with the main goal of the method.

Maximum effort is about increasing strength. So ask yourself this:

  1. Will doing sets of 2 or 3 reps instead of 1 lead to more muscle growth?
  2. Will doing sets of 2 or 3 reps lead to fewer strength gains than doing sets of 1?

The answer to the first question is yes. Don’t get me wrong, you won’t build as much muscle from sets of 2-3 reps as you would with slightly higher reps (4-6) or even from typical bodybuilding work.

But you will stimulate tissue growth, improve muscle hardness, and get stronger. Whereas with sets of 1 you won’t build a lot of muscle mass, except if you do a very high amount of sets with short rest intervals.

Note that I’ve created programs based on single reps before. But they don’t use the max effort method. They use single reps done with short rest intervals with heavy, but not maximal weights. That’s not the same thing as the max effort.

Related:  More on building muscle with heavy singles

If we’re taking strictly about the max effort method – ramping up to the top weight you can lift for 1, 2 or 3 reps using fairly long rest intervals – sets of 2 and 3 reps will build more muscle than sets of 1.

As for question number two, doing sets of 2 and 3 reps instead of 1 will not build less strength. Russian Olympic lifters, and now powerlifters, do most of their work for sets of 2-3 reps. They rarely max out in training, and they’re getting plenty strong!

You get the same neurological training effect from maximal work for 2-3 reps as you do from an all-out 1RM effort, without the drawbacks. You also build more tissue. So in fact you will build more strength doing your max effort work for sets of 2 or 3 reps.

The Frequency Advantage

Back Squat

When training toward a true 1RM you should do two bouts per week. For example, Westside has one max effort day for the bench, one max effort day for the squat/deadlift.

When working toward a 2RM you can have max effort stimulation more often, 3-4 times per week. This allows you to quickly become better at that type of work. In that case, alternating ramps to 2 and 3RM would be the best option.

Charlie Francis mentioned the huge difference in neurological impact between a 95-97% sprint and a 100% sprint. The latter could have lingering effects for days if not weeks; the former is a lot easier to recover from and still leads to improvements.

The same is true with lifting weights. There’s a strain that comes from going to a true 1RM. Even if it had more benefits than going to a 2RM, the fact that it prevents you from going hard more often might still make it less effective over the long run.

Playing Devil’s Advocate

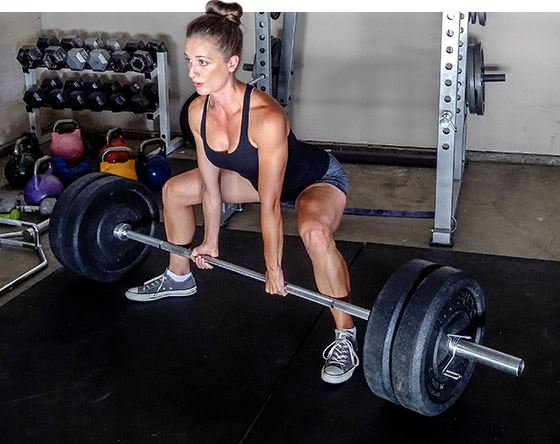
Rich Deadlift

Maxing out on sets of 1 rep is a special skill. If someone is good at doing all-out singles there can be a 7-9% difference between his 2RM and 1RM. But for most it will be a 4-5% difference.

In other words, take two athletes who have a 2RM on the bench press of 375 pounds. Athlete 1 frequently works up to a 1RM in training. Athlete 2 rarely works up to a 1RM in training.

Athlete 1 will be better at doing all-out singles. So he might max out at 405 while Athlete 2 who doesn’t practice maxing out on a single rep might only peak at 395.

Both athletes are at the same level of strength. Athlete 1 just learned to better display his strength in a true maximal effort.

That’s why if you compete in powerlifting you need to practice hitting a 1RM once in a while. This is especially important near a competition where you aren’t building strength anymore – you’re learning to display it under competitive settings.

But if you’re just training to become stronger, there’s no real need to make maximum effort with sets of 1 rep part of your training (not testing). And even competitive powerlifters would get better results maxing out on a 2RM more often than maxing out on 1RM.

Note: Geared vs. Raw Powerlifting

Powerlifter Squat

Geared powerlifting utilizes bench shirts, squat suits, super-tight knee wraps, humongous belts, etc. I’m not for or against geared powerlifting, but it is a different reality.

Setting up for a lift while fully suited and maintaining proper body position after a rep is very hard with full equipment on. So powerlifters who do max effort work geared up might have diminishing results from doing sets of 2 or 3 reps.

That’s one thing you must consider when designing your own program: you can’t follow the exact plan that someone uses if he isn’t lifting in the same conditions as you are.

3 Keys to a Big Raw Squat

Here’s what you need to know…

  1. Many of the pointers given to squatters are intended for those who are wearing supportive gear.
  2. There’s no need to prioritize the posterior chain when trying to bring up your squat. Squat strength depends on quad strength.
  3. To improve your squat technique, practice wall squats. To increase leg strength, practice front squats.
  4. Improve your form at the bottom of the squat by focusing on driving your upper back into the bar.

Raw or Geared?

Most of the advice you hear on the squat is written by geared lifters forgeared lifters – those who use special suits, heavy wraps, and other forms of supportive gear.

While that information has value, a lot of it would be unsuitable for a raw squat – „raw“ meaning free of gear.

Case in point: Sitting back. This is probably the most overused pointer, and it’s directed mostly at the geared lifter.

Luckily there’s some no-fail advice that raw lifters can use to improve squat performance. But first let’s go over a few things that don’t help.

Needless Advice for Raw Squatters

Good Morning

Let’s clear up some misinformation. There are two things you can disregard when trying to bring up your squat.

  1. You must prioritize the posterior chain.
  2. You must do good mornings to strengthen your posterior chain.

It’s been drilled into our heads that we need to be more posterior-chain dominant, but the truth of the matter is the squat is supposed to be a leg movement.

A lower bar position on your back will tend to make you bend over more. This is totally fine, but the intent should always be to stay as upright as possible. The more bent over you are, the more lower back and hamstrings you’ll use. But don’t forget about the quads.

Many of the top raw lifters and all-time greats prioritized quad training. The focus wasn’t on glutes, hamstrings, or lower back, but more on quads.

The quads have a ton of potential for growth. More hypertrophy will give you a higher ceiling for strength. Look at any great Russian squatter. They all have insane quad development. When you see muscle hanging off of your knees, don’t be surprised when your squat goes through the roof as well.

Out of the hole, you should always try to lead with the upper back first. Watch any world class squatter. Nearly everyone – both geared and raw – will try to lead with the upper back first out of the bottom.

As a powerlifter, it’s critical to save your lower back so you have back power left when your deadlift comes around. If you use your lower back too much when you squat you aren’t going to have much left when you deadlift whether you’re training or in meet.

Related:  The Truth About Squatting Deep

Good mornings, which are a great exercise to train the back and hamstrings, aren’t necessary for squatting world record weights.

In the past I tried doing lots of good mornings with no luck. I got really good at good mornings, but my squat went nowhere. I got to the point where my good morning was stronger than my raw squat and I was able to hit 600 for 5 with the giant cambered bar.

While my good mornings got a lot of attention, they didn’t do much for my squat total.

3 Keys to the Raw Squat

Key #1: Technique

Wall Squats

It’s damn near impossible to do a wall squat with poor technique. That’s what makes wall squats the best drill to teach you how to squat properly.

Simply face a wall and perform some body weight squats. If you lean too far forward your face will smash into the wall. If your knees come too far forward your knees will hit the wall. In both cases you won’t be able to achieve proper depth without hitting the wall. It’s a self-correcting tool.

Related:  Squat Right for Your Type

The only thing to watch out for when performing wall squats is that you don’t roll up onto the outsides of your feet to squat down.

Make sure your feet are firmly planted so that your big toe, heel and mid-foot have contact with the floor. Sit back and drive your knees out hard just enough to hit proper depth, and don’t overdo either one.

Try using wall squats in a number of ways:

For warming-up: Start with 3 sets of 5 wall squats before getting under a bar. Aside from practicing technique, it’ll warm up the hips and ankles before a heavy squat session. When my wall squats feel smooth I know I’m going to have a great squat session.

Self-training: If you’re a newer lifter, perform wall squats before you even touch a bar to ingrain the proper pattern.

Most lifters don’t learn strength like a skill. Squatting is an athletic movement just like a golf swing or a baseball throw. It requires technical precession and the wall squat is the best way to achieve this.

Assistance work: Using the wall squat for high reps is a great way to great extra work in. Try doing this with a band around the knees in order to work the hips.

You can also do these isometrically with the band to learn to constantly push out and engage the hips for an extended period of time. This will keep your knees from caving in when the weights get real heavy.

Key #2: Leg Strength

Arnold Front Squat

Most people think they fold over in a squat because their lower backs are too weak. This may be true for some, but more often than not, if your legs aren’t strong enough you’ll feel compelled to shift the load to the lower back since you can’t keep your hips under the bar.

The best exercise to help you keep your hips under the bar by building leg strength is the front squat. It’s a challenge because you can’t fold over at all. If your torso comes too far forward you’ll dump the bar. Like the wall squat, it’s a self-correcting exercise.

When you front squat, you’re going to be more upright, and your knees will come forward more than they would during a traditional back squat.

There are two main ways to front squat.

  1. The cross-arm grip is great for people with limited mobility. If your main focus is just strength this is completely fine.
  2. If you’re a competitive weightlifter then you need to learn how to properly rack the bar and utilize the clean grip. I prefer the clean grip because you can’t use your arms at all to assist you.

Since it requires a little bit more mobility, warm up before you go into your front squats. Here is a favorite I use every time to prepare my upper body for the proper rack position.

There are three reasons to make front squats a staple:

New lifters: If you’re new to squatting, the front squat should be a primary movement for your first few weeks. Use as a primary exercise and do 3-6 reps at a time. If you’re on a Westside split the front squat can also be thrown in as a max effort exercise from time to time.

As a supplemental move: Front squats are a great secondary movement to help build the squat. When done as a second move use higher reps in the 5-8 rep range for multiple sets.

For deloading or building phases: If you’re an experienced lifter coming off a meet, it’d be wise to use front squats as a deload.

Since you can’t front squat as much as you back squat, you won’t be loading the spine nearly as much. Use front squats as your main movement while your body heals up. You’ll go into your next training cycle feeling fresh and ready to go.

Key #3: Intent Out of the Hole

Squat

Lifters fail squats when their backs are comprising. This may be a result of too much forward lean or the hips shooting up too fast.

The best way to correct this is by correcting your focus. Think about driving your upper back into the bar on the way up.

A great way to practice and build strength in this position is the high-bar pause squat. The high-bar squat will allow the lifter to stay a bit more upright than a regular squat, but not quite as upright as a front squat.

Pausing in the bottom gives you a chance to find your groove and focus on the proper ascent. That way you can rise up focusing on driving back into the bar with your upper back.

Related:  Squat Mechanics: A Deep Analysis

A pause squat will help you build strength out of the hole and find your perfect bottom position.

A longer pause will help you ingrain a proper position. If you’re too far forward or too far back you aren’t going to be able to sustain that position for very long. If your technique is good, you’ll be able to sit in the hole with no problem. It will still suck, but you’ll be able to drive back up and ultimately finish the lift.

Tip: To help you stay upright and use your legs more, do these with weightlifting shoes that have a raised heel.

It gives you artificial ankle mobility since you start in a position of plantar flexion. This will allow you to let your knees drift forward more while still keeping your heels on the ground allowing for a more upright and quad dominant squat.

If you don’t have access to weightlifting shoes, performing these old school with 10 pound plates under your heels is totally fine. Just make sure you walk out carefully and keep your balance as you come back.

There are plenty of reasons to use high-bar pause squats:

As a primary exercise: Do anywhere from 3-5 reps and even singles on occasion. As you get closer to a meet using regular squats is advised.

If you need a break from the straight bar, utilize pause squats with a safety squat bar in order to give the shoulders a rest and tax the legs and the back simultaneously. The safety squat bar will teach you to use your upper back when squatting upward.

Supplemental move: Use them as a second exercise to help you build the squats. Do 1-3 second pauses, 5-8 reps for 3-5 sets.

Dynamic effort work: Use pause squats as speed work. This can be done with straight weight or with accommodating resistance.

The key here is trying to generate as much speed as possible out of the hole and driving back up with the upper back. Learning to squat powerfully from the bottom will teach you to drive through sticking points and ultimately achieve new personal bests.

Final Tips and Recap

Female Back Squats

  1. Don’t overthink the cues and advice used by geared lifters if your goal is raw strength and size.
  2. Good mornings are fine but aren’t necessary for a huge squat.
  3. Sitting back and driving the knees out hard are great cues but don’t exaggerate either one.
  4. Focus on screwing your feet in the ground and spreading your groin apart as you sit between your feet.
  5. Use the wall squat to ingrain proper squat technique.
  6. Use front squats to build leg strength and to practice staying upright.
  7. Perform pause-squats to build strength out the bottom, find your groove, and practice driving your upper back into the bar.

The 5 Best Exercises Ever

Here’s what you need to know…

  1. Loaded carries strengthen the entire body while punching increases agility and explosiveness. Both have been necessary tools throughout history.
  2. Rope climbing and pulling hit the upper body and recruit the core and legs.
  3. Lift just about anything from the ground to overhead. The heavier and more awkward the better.
  4. Heavy sled pushes nail the legs and increase metabolic conditioning. They’re a concentric-only movement which is easy on the joints.

The Standards

Stone Lifting

In order to make this list, an exercise had to fit three criteria.

First, the exercise had to be one conceivably done thousands of years ago. While Socrates taught physical culture and that „no man has the right to be an amateur in the matter of physical training,“ they likely didn’t have access to heart rate monitors, pec decks, or adjustable barbells.

Second, the exercise has to be one where multiple cultures around the world, independent of each other and throughout generations, have been found to do the same exercise.

Third, it has to be a movement where, if a room full of strength coaches were shown it, at least 50% of them would say it was good, less than 20% would say it causes crippling injury, 15% would say only wussies did those, and at least 10% would actually be able to do it themselves.

Here are five movements that fit those criteria.

1. Loaded Carries

Loaded Carries

Carry two large buckets full of crushed stone up a hill and tell me you didn’t get a massive workout. Now do it for the next 8 hours. Your rest period is the time it takes to walk back down the hill and get the next two buckets full of stone.

Do this for a couple of months without a break and you’ll have a new understanding of exercise. If you ever want to get in serious shape and make a few bucks along the way, become a bricklayer’s or mason’s assistant.

Loaded carries are an exercise that can be used to train the entire body, including grip strength, shoulder stability, core strength, resisted breathing, balance and gait, and conditioning, of course.

Related:  More on loaded carries

Loaded carries can involve any implement, but the more awkward the better. While dumbbells and barbells are definitely easier to work with in a gym setting, things like sandbags, buckets of water, sand and rocks, or even another person can up the ante.

Furthermore, if the loading isn’t uniform, meaning one side is heavier than the other or the weight is constantly shifting around, you can take your carry game to the next level.

To do these, use a weight that’s considered relatively heavy by most mortal men, stand tall like a proud warrior, and walk until you can’t feel anything anymore. The next time, add weight and try to beat your distance.

2. Punching

Punching

In military service, hand-to-hand combat was a staple, and given the popularity of sports like boxing and MMA today, it’s a worthy addition to the list. There’s something visceral about throwing a punch, and even more visceral about connecting.

While not everyone may want to step into the ring or octagon, they can still train with punching movements using heavy bags or speed bags, or even through vigorous shadow boxing. Train like you intend to have to fight for your life.

As the old Spartan saying goes, „Come back with your shield or on it.“

A fighter would likely tell you that a great punch originates in the legs and hips. However, many great coaches will take it one step further and tell you that punch strength comes from the glutes.

Get your punching-side leg ground solidly into the floor so you can generate force through knee extension and hip external rotation and extension. This can make the difference between throwing a punch that just annoys a 12 year old and a knockout punch that can win the championship.

If you have a heavy bag, work on getting strong connections with your wrist locked in neutral and your knuckles flush to the bag. Take one punch at a time and work on getting the drive to come from the hips and legs, finishing with the arms.

If you have a speed bag, work on connecting with the bag and maintaining a solid tempo without failing too badly. This is skill based, so don’t sweat it too much if you don’t have the eye-hand coordination down yet.

If you have nothing to punch, shadow boxing is an option. Throw punches as if you were trying to connect with an invisible object. Try to extend your arm and pull back with speed and control.

If you don’t want to punch anything, just do as many pushups as possible. By yourself. In your basement. With the lights off.

3. Rope Climbing and Pulling

Rope Climb

It’s tough to build pulling strength unless you’re actually pulling. It’s one of the great self-regulating activities. Either you climb the rope or you don’t. Either you pull the rope towards you and whatever else it’s attached to or you don’t.

Rope climbing is a fantastic upper body exercise that involves a lot of core strength and leg involvement. Of course, some people can climb without using their legs, and I hate them for that.

Related:  More on the rope climbing

There’s a ton of grip strength, shoulder strength, back strength, and core strength involved. There’s also a lot of technique involved in rope climbing, which means you’re likely going to have to start slow and build up.

Start with either a sliding rope pulldown, a hanging pull-up on a stationary rope, or just doing chin-ups with mixed grips.

Rope Pull

Rope pulling can produce a lot of similar benefits, with the added fun of being rooted into the ground and producing power through the legs and core.

Remember the good old days of tug of war in PE where you’d put the big kid at the back as an anchor, and then everyone would wind up pulling, sliding, falling over, and looking stupid?

The guys on the winning team won because they stayed on their feet and kept pulling while the losers lost their footing and wound up in the mud.

Successful rope pulling is as much about balance as anything related to strength.

Instead of standing upright, you’ll have to lean back in the direction you’re pulling. Your hips will have to be about 18-24 inches behind your feet, and the lower you can get your butt to the floor the better, especially if it’s a heavier load.

When pulling, use a hand over hand approach with a short range of motion to try to keep the movement coming from the upper body. If you want to use a longer ROM, you’d do best by setting your hands and turning it into a hip and leg driven movement, kind of like a horizontal deadlift.

Sleds are amazing tools for rope pulls, as they can easily be loaded up. Use a length of rope as long as possible. Get aggressive with the pulls and work on speed. If the loading is massive, unleash hell on the entire world attached to that rope.

4. Lift From the Floor to Overhead

Overhead Lift

This is one that has classically been used as a showpiece for feats of strength.

Long before The Mountain dominated Icelandic log walks and the Red Viper’s skull, guys like George Hackenschmidt, Louie Cyr, and Eugene Sandow popularized the art of strength by lifting very large and awkward weights over their heads.

Ancient Greek soldiers would do similar things with large rocks. Versions of kettlebells were used by ancient Shaolin warriors (called Shi-Suo Gong, the art of the stone padlock) many millennia before Russians adopted them.

At the turn of the 19th century, Thomas Inch would routinely press the dumbbell bearing his name, a 2.38inch diameter-handled 172-pound monster of a weight, with one hand. And who can forget Ultimate Warrior pressing Hulk Hogan at Wrestlemania VI?

Depending on the load lifted and whether using one hand or two, the movement will usually begin with a modified deadlift. If it’s possible to clean the weight to your shoulders in one go, do it. However, in the case of something like an atlas stone lift or continental lift, you may have to lock onto the weight with your chest and roll it up your thighs.

From there, the press can be either a strict press or jerk press, depending on whether leg drive is available or not. Some competition lifts indicate no leg movement, such as the classic Olympic press that was included in competitions until 1972.

But when the load becomes significant enough, leg drive will become necessary.

Any object could conceivably be used for ground to overhead lifts, but again the more awkward the better. Heavy sandbags, large rocks, loaded or half-full kegs, or for the more commercially driven, a tough kettlebell or two will do.

Rocking out a clean & jerk or atlas stone lift are also strong variations of this movement.

5. Heavy Standing Push

Prowler Push

A heavy standing push is one of those fundamental movements used to get stuff from one place to another when it was heavier or bulkier than what could be carried.

Today’s common gym version consists of a sled push, but if you don’t have a sled you could arrange to push a car around a parking lot as long as a buddy was steering and the car was in neutral.

Heavy Ass Sled Pushes (HASP) are a staple of a lot of elite coaching programs in various sports and activities, and for good reason. The concentric-only resisted phase of the movement is easier on the joints than loaded eccentric movements.

Related:  More on the value of the sled push

The reciprocal unilateral movement is also very replicative of most sporting activities, and the total body tension under resisted breathing is awesome for developing cardiovascular sustainability and work output under duress. Plus they’re badass as hell.

The walking push mechanics are quite simple. You could take a linear approach where your hands, shoulders, and hips are aligned with each other (essentially holding an overhead position while bent forward).

Try to avoid letting the foot come ahead of the vertical axis of the hips to reduce the pressure on the low back, and work on getting full extension with each stride coming from the hips and knees.

Or you could lean into it with your torso at a 30 or 40 degree angle from the ground.

If using a commercial space, pushing on turf or carpet will be massively easier than trying to push a sled on rubberized flooring. Concrete or asphalt works well for outdoor work.

For added points, try to push an object up a gradual incline like you’re building the pyramids.